
Reading Time: 8 minutes
I finally turned my attention to a project that had been tickling the back of my task list since we moved into this house. It was our first house with appliances, other than a TV, that were internet-capable. I turned off most of the network options so they cannot communicate but there are a couple—an old Sony PS3 game console, a refrigerator—that get software updates that I wanted to keep enabled. I had long considered adding a DNS sinkhole by using the Pi Hole application and I finally put it into place.
There’s really a lot less to it than I thought. Pi Hole is a mature application and it really was more of deciding how to do it than getting it accomplished. The first place to start was the hardware and figuring out where to run it.
Pi Hole can be created as a Docker image and I have been fiddling with containers of late. But I didn’t really want to make this more complicated than necessary. I don’t know enough about Docker at this point that I would want to use a container with an app that I also didn’t know much about.
Fortunately, I was able to dig out an old Raspberry Pi. We bought one for one of the kids back in 2012, the original Model B that came with ethernet and a pair of USB ports. The kid that got this is now programming in VBScript and Python and doing amazing things with ArcGIS. The device itself, once no longer needed, went into my cables box along with other old but not yet unusable tech. I had done a bit of clean up when we moved from Canada but I tend to keep most things that have a potential future use. With something like a Raspberry Pi, you just never know.
The key question as it always is with technology was whether I met the minimum requirements. The Pihole project requires a couple of gigabytes of storage and 512MB of RAM. Fortunately, that’s exactly what I had on hand. The Model A only had 256MB but the Model B has 512MB.
In a sense, I was lucky. If I had had to buy a new Pi computer, I might have balked. Even the most basic Raspberry Pi you can buy now has way more firepower than I would need for this project. But it also means that, if you don’t have a Pi, you can pick one up for less than $50 US and know it has plenty of memory to do this and more.
Installation and Configuration
The longest part of the process was waiting as I used the Pi imager on my Windows computer to load the Raspberry Pi operating system to an SD memory card. I am using a 16 GB card, which itself was a cast off when I upgraded the card in my camera. Waste not, want not.
While it was working through this process, it gave me more time to look beyond the installation process. I realized, belatedly, that I had misunderstood one of the fundamentals of the Pi Hole or any DNS sinkhole. In my mind’s eye, it was a potential throttle on network activity. Say, for example, I’m uploading a file to the internet that is a couple of gigabytes in size. In my head, I was picturing the entire file having to go through the sinkhole, linearly: my PC, Pi Hole, router, modem, internet.
It’s wrong and I’m embarrassed at how long it took for me to get the picture right in my head. I loaded the card into the Raspberry Pi, connected a monitor, keyboard, and mouse to it, and set it up for our internal network. As I was doing that, I started to realize that the only thing that had to use that 512MB of RAM was the DNS query itself. That was lightweight and cached and had nothing to do with bandwidth. So, although every device inside our network is looking at the PiHole, once they have an authorized destination, the experience for the device is the same as it ever was. The only change is that, when a device tries to convert a resource request from a domain name to an IP address, the Pi Hole intercepts it rather than it being sent right on to Google or Cloudflare or some other DNS.
The Raspberry Pi installation worked smoothly. Once I could see the device on my monitor, it restarted a few times as it got itself configured. It was pretty slow as it loaded the graphical user interface, given the RAM, but that was easy enough to wait through. I gave it a static IP address and turned on secure shell (SSH) as I figured I would want to be able to remotely administer it at some point. Since SSH is blocked from outside, I wasn’t worried about it being available for internal access.
To save time, though, I planned to run the Pi Hole installer while I had it up on my monitor. This didn’t work for me. The keyboard configuration and my keyboard were not matched and I wasn’t able to figure out why. The Pi Hole installation instructions are very simple but they required the use of the “|” (pipe) symbol. My keyboard can obviously type that but the key was not recognized in the Raspberry Pi configuration.
I took a chance and assumed that, if I connected remotely, this issue might go away. So I shutdown the Pi, unplugged it from ethernet and power, and reconnected it directly to the router and the adjacent power backup. By the time I was back to my home office, it was available on the network.
When I connected—using PuTTY—my hunch paid off. I was able to log in as my Pi user and run the installation for Pi Hole. Once it finished, I had the information I needed to access the web interface and I could start to complete the configuration for bringing it online. As I understand it, the web interface is a duplication of command lines you can run but I am finding the web intuitive. I have not explored the command line any further at this point.
The Pi Hole handles the DNS queries so I wanted it to use the same service we were currently using, which is a modified Cloudflare resource. Although you can use the 1.1.1.1 service, we have used the Family one that includes malware blocking at 1.1.1.2 (and 1.0.0.2). There is an option to pre-populate common public DNS services in Pi Hole or you can type in your own custom IP addresses. Clicking the Cloudflare option will use 1.1.1.1 so I typed our alternates in below.
For ease of customization, I also turned on the Pi Hole’s DHCP server. This meant that any device that connected to our router would get served the correct DNS information as part of its connection. I turned off the DHCP on our router so that there wouldn’t be any confusion and set up the range of available addresses to be the same. At this point, the next time a device renewed its IP address, it would get the information from the Pi Hole instead of the router.
We use dynamic IP addressing (DHCP) but have always used a custom DNS option on the router. Otherwise, when you connect, you get the DNS servers provided by your internet service provider (ISP). I’m always a bit leery of trusting the ISP. The ISP is trying to sell you a product, upsell you to new products, and extract marketing information about you. It probably also stems from having had some very small ISPs in the past who I wasn’t confident were careful about securing and maintaing their services. Nowadays, I’m more worried that my ISP will try to customize the DNS so that it can take me to ads or tracking services or otherwise use this basic tool for malicious ends. Better to take a chance with a more public, if commercial, option.
I moved our youngest kid into their dorm last week and took a moment to make sure their computer was also reconfigured. When it accessed the building internet, it was given three DNS servers: two from Google and one from the ISP. First of all, I try not to use anything Google. But I really didn’t like the idea that the ISP was in there. I edited the network adapter settings on the PC so that it used custom DNS (in this instance, Cloudflare).
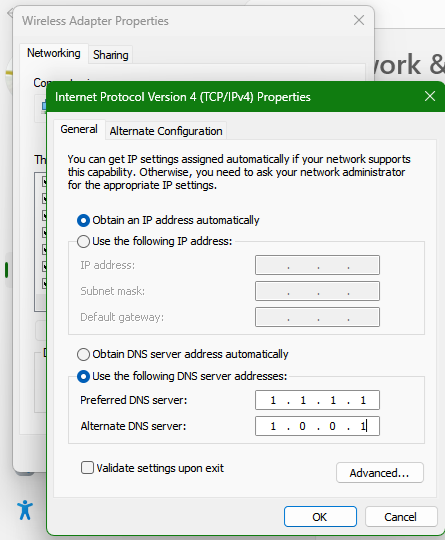
I also confirmed that their web browsers were using DNS over HTTPS (DOH) and that it was set to a specific provider and not “OS Provided”, just in case they needed to allow the ISP DNS in future. Both Chromium-based browsers (Google Chrome, Microsoft Edge, etc.) and Firefox-based browsers (Mozilla Firefox, Librewolf) support DOH. There is usually a drop-down list in your web browser settings (open your browser settings and search for DNS and look for DNS over HTTPS, “secure DNS” on the Brave browser). You can also provide a custom DOH provider.
As I say, at home we use the 1.1.1.2 malware DNS service. In the DoH world, you need to have an address, not an IP address. Google provides a URL for their DNS over HTTPS (their DNS IP address is 8.8.8.8). Cloudflare has three: the baseline one, the one that also blocks malware sites that Cloudflare has identified, and the one that also blocks sites that Cloudflare has tagged as “adult”. So, in our case, for DOH, I use:
https://security.cloudflare-dns.com/dns-query
in any web browser I use. That includes my workplace web browsers, where I figure an ounce of prevention is worth a pound of cure. I’m not a fan of web content filters—it’s a primary reason I do not use the Cisco OpenDNS resource—but I do like the idea that someone is watching out for malware.
I realize there are many perspectives on Cloudflare’s role in the internet. For DNS, at least, I appreciate that they spell out what they are doing.
– Cloudflare will not sell or share public resolver users’ personal data with third parties or use personal data from the public resolver to target any user with advertisements.
– Cloudflare will only retain or use what is being asked, not information that will identify who is asking it.
– Source IP addresses are anonymized and deleted within 25 hours.Our ongoing commitment to privacy for the 1.1.1.1 public DNS resolver, Cloudflare, April 1, 2026.
Perhaps not great from a marketing perspective to publish that on April Fool’s.
I have thought about moving to an EU-based DNS provider like DNS4EU in order to put our family internet traffic outside of the reach of US government agencies. They provide the same options as Cloudflare, both unfiltered DNS and various levels of proscribed content, and both DNS and DNS over HTTPS. They are funded by the European Union, so lack the commercial drive that services like Cloudflare or Alphabet have. I have tried DNS4EU in the past with their protective + ad blocking feature and I didn’t notice much difference in the ad blocking.
It seems weird to say it but there is the distance factor to consider: your DNS servers should usually be “close” but I often wonder how much of an issue that is any longer. I mean, on an internet that now has so much latency due to the impact of artificial intelligence bot, and malicious javascript, and ad or tracker blocking, would we even notice a couple more milliseconds in our DNS lookup? For that reason, DNS4EU remains a possibility for me.
Segmenting the Appliances
It took longer to write that part of the blog post, above, than it did to configure the Pi Hole interface. Once I had it set and it had restarted, I renewed my own IP configuration to get the new information. Everything looked good. The gateway IP address remained the same (192.168.0.1) and the Pi Hole computer, the Raspberry Pi was set as my DNS server (192.168.0.2). Now, every request I sent to the internet would be intercepted by the Pi Hole, who could then mediate the DNS request from Cloudflare or my “upstream” DNS provider.
I like the Pi Hole interface for seeing what is going on with the traffic. At the start, I used the most invasive logging so that I could see what devices were going where. The Pi Hole web interface has a lot of information on it. I have turned down most of the logging since then although I still am watching the highest level information I can.
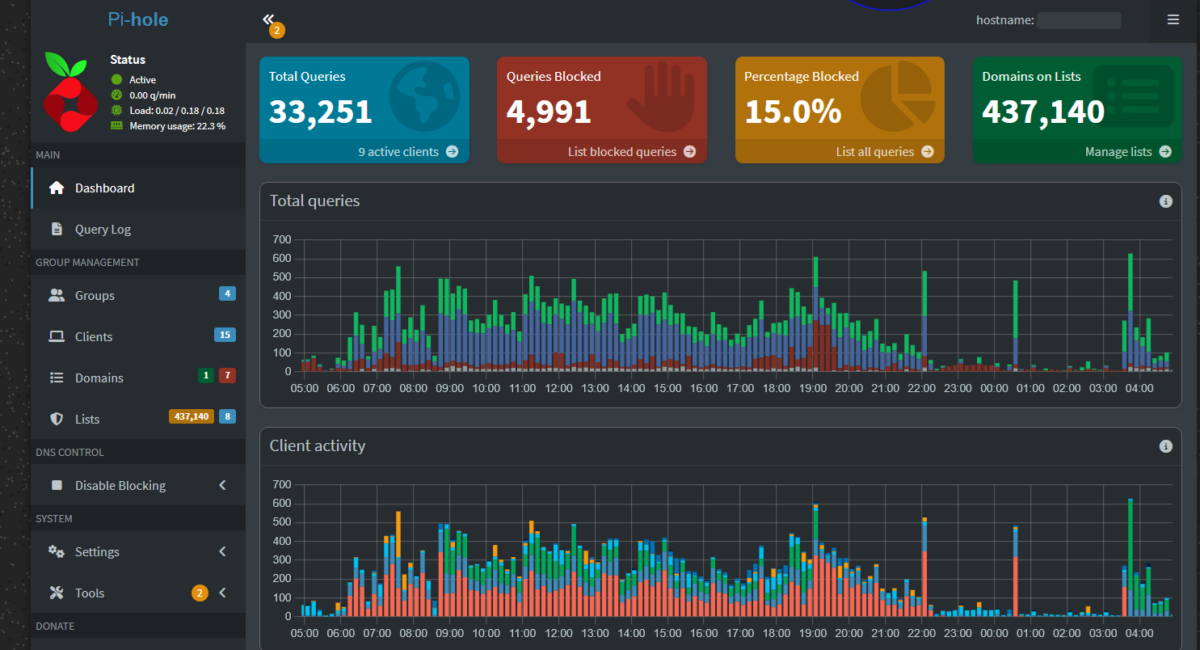
One thing I did immediately was to create groups. There is a Default group when you install Pi Hole. I created three additional groups: Appliances, Network, and Humans. I wish the group functionality was stronger but this was enough to get started. Once I had my groups created, I could start to add blocking lists.
Pi Hole is billed as an ad blocking tool and it is good for that. You can also use it to block any remote IP address or domain. The ad blocking was going to be a benefit for the human users but I also wanted to block unwanted communications from the appliances. The group function allows me to use different collections of blocking lists for different devices using the Pi Hole. On the lists page, you can see that some of the lists are configured solely for Appliances while others are configured for multiple groups.
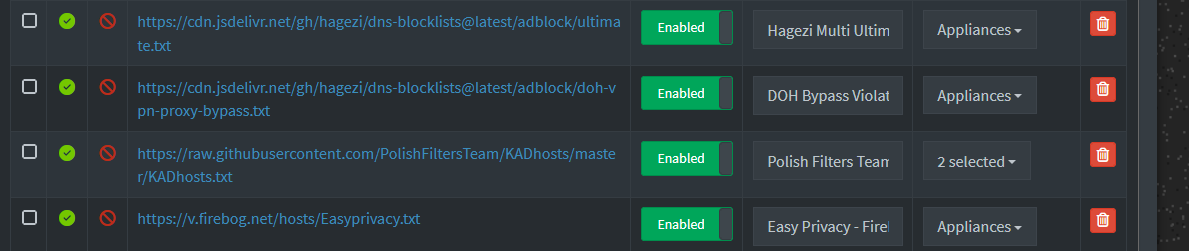
I have tried to be careful about only using regularly updated block lists for the Humans group. I’m less worried about the Appliances. The lists are really just for that very rare occasion where something gets to the appliance and then wants to connect out to somewhere else: something like a supply chain attack where it is sent to us by Sony for the PS3 or Samsung for the refrigerator but tries to connect elsewhere once it’s installed. I’m not sure how big an issue that is. In fact, once you have your clients configured on the Pi Hole, you can see which servers they are contacting on a routine basis and block those individually if you want to.
Something I had not thought of until I was reading more about the Pi Hole was appliances that are hard-coded for specific DNS. In other words, even if you have configured your Pi Hole and router for DNS, you may have devices that are connecting using their own configurations. It makes sense, given what I do to my own web browser and our kids’ PCs. This author had a great fix for that, which essentially routes any requests for DNS other than the Pi Hole into a dead end using your router’s port forwarding. I would never have thought of that on my own.
All in all, I’m pleased with how it turned out. The only investment so far has been in time spent learning and implementing the Pi Hole. There’s been no noticeable degradation in our network activity. Since we al use ad and javascript and tracker blockers, there has also not been a noticeable change in our interfaces. I have been interested to see that there is constant blocking of the appliances, though, and occasional spikes based on application usage that I (a) do not yet understand but (b) am glad are occurring. If anything, the whole goal of the Pi Hole was to help block things that I could not otherwise see to block.